DVB to DVD-R guide
DVB, or Digital Video Broadcast, is on the way to become the standard for standard resolution digital TV. It is available in 3 subvariants: DVD-C (C for cable), DVB-S (S for satellite) and DVB-T (T for terrestrial). DVB-S is probably the most widely used, because it doesn't require cable to your home, and no terrestrial broadcast antennas as DVB-T does. DVB-T has just recently been introduced in countries like the UK and Germany but other countries are planning to change their analogue terrestrial broadcasts to DVB-T as well. DVB is also known on other continents, but mostly as satellite TV. In countries like the USA or Japan, digital TV is often realized via HDTV (ATSC), which relies on cable.
Since most (or all) of toady's TV only have an analogue tuner, you need an external device called settop-box to receive DVB broadcasts. You connect these boxes to your satellite (or cable plug or the house antenna), and from there to the TV. Alternatively, you can buy a DVB card for your PC. These cards often have analogue video and audio outputs so you can connect your PC to your TV. The advantage of a PC based solution is that you'll have direct access to the content that is being broadcast. Since DVB is digital and uses the same audio and video compression formats (MP2 and AC3 for audio, MPEG-2 for video) and even the same resolution as a DVD, it is actually quite easy to do something with the content that is being broadcast. It is also possible to stream the digital video stream from a settop box, or to record it there (if your settop box has a built-in HD) and later transfer it to your PC. Obviously, you could also simply capture the analogue output from the settop box, but where would the fun in that be? If it is digital it should stay digital. That being said, let's get down to business. For now, we're going to stick to PC based hardware but if I can find any volunteers for settop box guides we'll go in that direction as well.
You'll need the following software for this guide
A DVB player and recording software
PVAStrumento or ProjectX
MPEG2Schnitt (that's German
for MPEG2Cut)
IfoEdit
DVDFab
Step 1: Select a recording software
The first step is grabbing broadcast content and bring it to your harddisk. I obviously don't have every DVB card available so I stick to what I have: the TechniSat SkyStar2, a DVB-s card. This card is well supported and is quite cheap, but does not have an on-chip MPEG-2 decoder, so if you still have a Pentium 1, you might want to stay away from this card.
The SkyStar2 comes with a software called DVBViewer. DVBViewer is a full-featured DVB viewing and recording application, which is quite easy to use and will do just fine for starters. However, it is limited in a couple of ways, most notably (and that's not mentioned), it cannot record AC3 audio. While AC3 is not the standard format (yet), being able to record content that is broadcast in Dolby Digital (or even Dolby Digital 5.1) is a distinctive advantage. DVBViewer is also not capable of recording multiple audio streams at once (useful if a station broadcasts content in the original language as well as a dubbed stream). I'll only treat the basics of DVBViewer (searching for channels, recording), but there is an excellent English manual available at the DVBViewer site which I consider a must-read if you want to explore the full power of this software. DVBViewer supports recording separate elementary stream (video and audio separately), as well as MPEG-2 PS (program stream, a regular .mpg file) and PVA.
If you want AC3 capabilities for free, and/or have a different card, you might want to consider ProgDVB. It isn't as well-featured as DVBViewer, but it does its job and it's completely free. ProgDVB can record ES, PS and PVA.
Another option, and one I'm really fond of (in fact I made it my default DVB program despite it having some quirks that I hope will be ironed out one day) is DVBPortal. For me, it proved to be the fastest application in terms of channel switching (and being a member of the male gender I also like to zap around ;), and it can record multiple audio streams at once. It also supports AC3 and it is free. DVBPortal can record in the TS (Transport Stream) format.
For a huge list of existing applications and card compatibility, please refer to this site.
Now, before you make your decision let's have a look at the possible recording formats: Most DVB recorders support the PVA format. PVA contains an MPEG-2 program stream, but contains additional timing information which can be used by special software to ensure that your audio and video will be in synch even when you have transmission errors. Therefore, I strongly suggest that you stay away from elementary streams and program streams. If you have perfect reception and never have any video breakups you can try PS, but bad things always happen when you least expect them.. TS streams are what is actually being broadcast. They contain all the information sent by a specific TV channel. In other words, if a channel is using multiple audio channels and you want to capture more than one at the same time, TS is the way to go. Note that the actual editing of the captured content (cutting out commercials), will remain the same regardless of the format.
So, use PVA for single audio channel recordings and TS for multiple audio channel recordings (or in case of DVBPortal you don't really have a choice).
Step 2: Record a DVB stream
Having selected a suitable software it's now time to get started. As previously announced, I'm going to treat DVBViewer, ProgDVB and DVBPortal. I'll mention channel search, special installation notes and how to capture but won't go into details of other operations the softwares support.
Step 3: Demultiplex the DVB stream
Now that you have either a PVA or TS file, it is time to extract the elementary streams (audio and video). You have two options here: PVAStrumento and ProjectX. PVAStrumento is easier to use, and should usually work fine, but ProjectX has proven to be more stable in my tests, and gives you about every option you could possibly desire (maybe one day I'll try to cover them all).
If you're wondering why the heck you're capturing to a single file, then split up the captured content in video and audio, I suggest you revisit step 1. We're not only demuxing in this step, we're also ensuring that our audio and video stay in synch even in the presence of transmission errors.
Step 4: Cut out commercials
Don't you love it when your favorite movie is interrupted by commercials? Well, we're gonna get rid of them now. Start up MPEG2Schnitt.
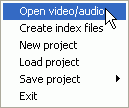
Select File - Open video/audio and select your demuxed video file (normally that's a .mpv file). Don't worry about the audio, MPEG2Schnitt will automatically open associated audio files as long as they have the same name (for instance movie.mpv and movie.ac3). The example shows just one MP2 audio stream but the procedure is the same for multiple audio files and or AC3 audio.

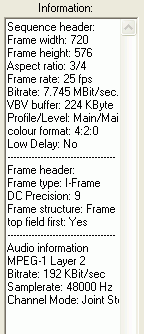
 In
the left part of the window, MPEG2Schnitt will show a lot of information about
your source.
In the center, we have, big surprise, the vide preview and right below it, a
list of our sources:
 Now
in case you have multiple audio files of one format, MPEG2Schnitt might now
have added them all, so right click in that window and select add audio,
then add your additional audio stream.
At the bottom of the window, we have the controls:

First we have a slider which you can use to move around in the video stream. Then we have Play and Stop buttons, which have obvious functions. The < IN and IN > buttons jump to the previous / next I frame, the < OUT and OUT > buttons jump to the previous / next P frame. While the distinction between the frame types is not a must to know (if you want to know check out the glossary), it is important to know that a video must begin with an I frame, but can end with a P frame, hence the naming of those buttons. Use the slider, then the IN buttons to move the I frame that is closest to the start of your movie, then press the In button:

Then move the slider to the right, until you locate the first block of advertising. Then use the slider and OUT buttons to locate a suitable position to cut the video stream without getting any of the annoying advertising inside your video. Press the Out button to mark the end of the first cut, then press New to add this part of the movie to your Cut list. The cut list is shown to the right of the video preview. As you select your in and out position, the timecode of the selected cut points, along with the length of the part you're going to cut is shown to the right of the buttons. You can also use the go to In and go to Out buttons to go to the start and end of the current cut. Then repeat this position for the other parts of the movie.
Also note that the < and > buttons can be used to move one frame forward / backward, but keep in mind that you must cut at a I or P frame (but in fact MPEG2Schnitt won't let you press the In and Out buttons if the current video position is not appropriate).
In the end you'll have a cutlist like this:

If you want to edit an existing cut, click on it, then the Modify button at the bottom will become active. Change your in and / or out position, press Modify and the selected cut will be changed accordingly. Or if you want to delete a cut, right click on and select Delete selected marks.
It's now time to cut for real.
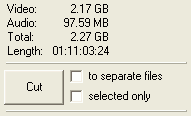
 Just
above the Cut button, you'll see the properties of your output. Our project
will only be 2.17 GB so there's plenty of room for another movie on the same
DVD.
Now if for some reason you'd rather want each cut to get a separate file, you could check to separate files, or if you want to extract just one cut, select the appropriate cut from the Cut list, then check selected only and press Cut.
Normally, you'd just press Cut without using any of those options.
The cutting operation will once again take a while, but in the end you'll have
one mpv file containing just the movie, and the appropriate audio files.

Step 5: Author the DVD
Obviously, there are many possibilities for this step, but for now we'll use the only freeware solution, IfoEdit. You can of course also use a commercial program. You'll find a list of DVD authoring guides here.
Once you've started up IfoEdit, select DVD Author, Author new DVD.
![]()
This process is very straightforward:
 Press
the first single dot button to select your video stream, the 2nd button to select
your audio file(s). Then select each audio stream and set the appropriate language
from the dropdown list on the left.
You won't have any subtitles so you can skip those.
Now for chapters. If you want chapters, you might want to reopen your cut video stream in MPEG2Schnitt and find some suitable chapter positions. Write down the frame number of those positions, then add them to a file called CellTimes.txt, one position per line. Here's a short example:
5626
11592
17771
22502
Then create those chapters by pressing the 4th single dot button and selecting your CellTimes.txt file.
Finally set an output path and press OK to start the authoring process.
In the end, your Destination directory will contain something like this:
02.02.2004 22:05         6'144 VIDEO_TS.BUP
02.02.2004 22:05         6'144 VIDEO_TS.IFO
02.02.2004 22:05        51'200 VTS_01_0.BUP
02.02.2004 22:05        51'200 VTS_01_0.IFO
02.02.2004 22:03 1'073'739'776 VTS_01_1.VOB
02.02.2004 22:04 1'073'739'776 VTS_01_2.VOB
02.02.2004 22:05   341'684'224 VTS_01_3.VOB
               7 File(s) 2'489'278'464 bytes
As you can see, this doesn't fill a DVD-R. In fact we could just add a second movie. You would process the 2nd movie just like the first one. Here are the contents of my 2nd movie: In case there's no room for a 2nd movie you can skip ahead to burning.
02.02.2004 22:13         6'144 VIDEO_TS.BUP
02.02.2004 22:13         6'144 VIDEO_TS.IFO
02.02.2004 22:13        43'008 VTS_01_0.BUP
02.02.2004 22:13        43'008 VTS_01_0.IFO
02.02.2004 22:11 1'073'739'776 VTS_01_1.VOB
02.02.2004 22:13 1'025'511'424 VTS_01_2.VOB
               6 File(s)  2'099'349'504 bytes
In total, that's below 4.37 GB and will thus fit on a single DVD. If you're slightly above DVD-R size, you could just use a one click tool to shave off some MBs to make the whole thing fit on a DVD. As long as the compression factor remains small (say below 15%), the quality loss won't be too visible.
Then, you have to rename some of the files. I took my 2nd movie and renamed it so that it looks like this:
02.02.2004 22:13         6'144 VIDEO_TS.BUP
02.02.2004 22:13         6'144 VIDEO_TS.IFO
02.02.2004 22:13        43'008 VTS_02_0.BUP
02.02.2004 22:13        43'008 VTS_02_0.IFO
02.02.2004 22:11 1'073'739'776 VTS_02_1.VOB
02.02.2004 22:13 1'025'511'424 VTS_02_2.VOB
In other words, I renamed every VTS_01 file to VTS_02. Now copy every VTS_01 and VTS_02 file to a common directory (and forget about VIDEO_TS.BUP and VIDEO_TS.IFO, you won't need them).
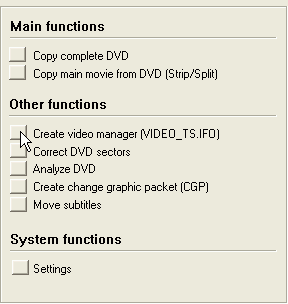
Then start up DVDFab and select Create video manager (VIDEO_TS.IFO).
 Then
select the directory where you copied all your files to, and press Continue.
It will only take a second, then DVDFab will show you this message. As the message says, the missing VIDEO_TS.IFO and VIDEO_TS.BUP files have now been created.

Back in the main screen, select Correct DVD sectors and press Continue (the
path will already be selected unless you have closed DVDFab in the meantime).

Now all that remains to be done is burn the DVD.
This document was last updated on February 8, 2004