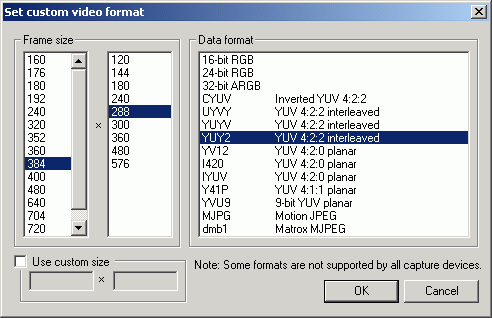
Video -> Set Custom Format
In the "Frame size" box choose 384*288 (when directly capturing for VCD at 352*288), and for the "Data format" choose YUY2.
If YUV does not work for you because of your hardware you can of course use any other codec, especially the MJPEG codec.

When capturing from analog sources, you often see a colored (usually green) line on the bottom of the picture. This is ugly to look at and can also lead to dropped frames. This problem can be solved by simply reducing the height of the captured video slightly. You can just deduct a few lines off the height. For example, use 286 instead of 288.
Choosing the Capture Codec
No matter which resolution you chose earlier, now is the moment when you must finally choose which codec you want to use for the capture process.
Video -> Compression -> choose desired capture codec

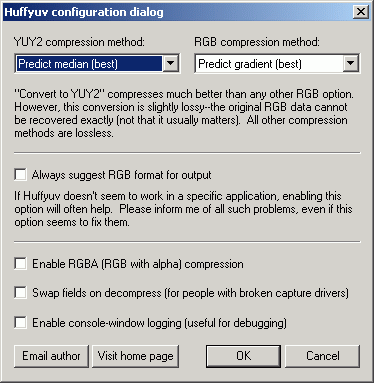
Now you can either choose Huffyuv (leave defaults) or PicVideo MJPEG.
If it is possible to choose more than one Huffyuv codec, make sure you choose the one for the data format you just entered in the previous step (e.g., YUY2).

For the PicVideo MJPEG codec, set the quality to 18 or 19, and under Advanced, set Luminance Quality to 2 and Chrominance Quality to 3.

Saving your settings
When you are done with your settings, it is time to save them to avoid having to go through the whole process every time.
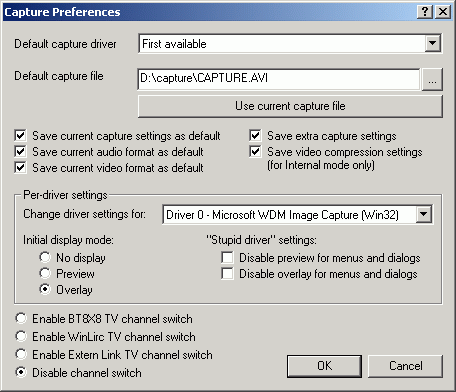
Capture -> Preferences
Now you have to save the "Default Capture file" in the same directory as you have saved your spill drives, in my example D:\capture\.
Now just check all boxes next to 'save'.
Set up "Initial display mode" the way you need it (WDM drivers use Overlay, otherwise No Preview).
The options to enable channel switch depend on your hardware. If your card is one of the below mentioned, you can check it, otherwise you should leave channel switch disabled.

Noise reduction
The worse the source is the more disturbances you'll have in your capture. This is the so-called "Noise". VirtualDub lower the amount of noise, which is often also responsible for dropped frames. Unfortunately, this also softens the picture and needs some CPU power too.
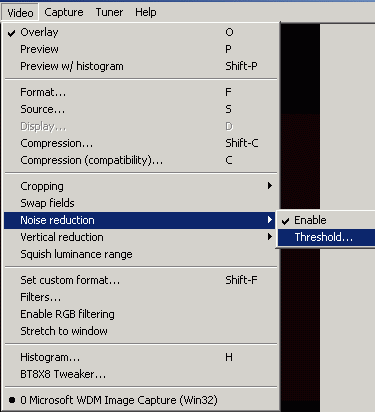
You can switch on this option under Video -> Noise Reduction -> Enable.
You can set it up to your liking in Video -> Noise Reduction -> Threshold.
Unfortunately, the noise reduction setting cannot be saved.

If you've chosen this option (which I do only when dealing with bad VHS tapes), the rule "more is better" is not true. From my experience the slider should not exceed 5 dots, and I usually choose 2 or 3.

Now you are finally done with the important settings and can proceed to the actual capture process.
Next step: CAPTURE: <NEXT>
BACK to the Index: <HOME>
Last edited on: 01/13/2003 | First release: n/a | Author: BaronVlad | Translator: SteVe(killingspree) | Content by Doom9.de