After we've finally captured the video, we will proceed to the task of cutting
out unwanted parts (e.g., commercials, but also any unwanted scenes). Furthermore,
we will apply different filters and adjust them to each situation. Therefore
we load the video into VirtualDub:
File -> open Video File
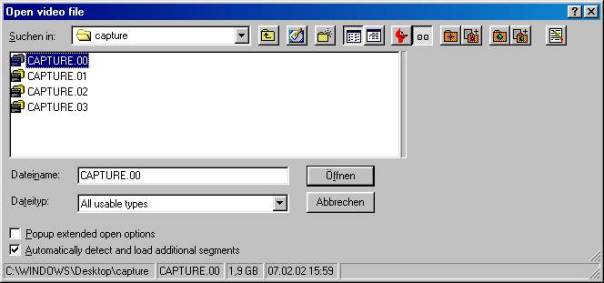
Now you have to browse to the folders where you saved the spill drives. There
you have to open the files capture.00.avi (or whatever it is titled, important
is the "00"); the subsequent files will be loaded automatically.
Using the filters
Depending on the resolution, source, type and quality of your video there are
different filters you can choose. There is an almost uncountable number of filters
available on the net and you are free to try all of them. The basic filters
are already included in VirtualDub and Donald Graft has a huge collection of
his own and third party filters on his homepage http://shelob.mordor.net/dgraft/
Before being able to use any new filters you'll have to copy them into the
'plugins' subfolder of VirtualDub and restart the program.
I'm going to just cover the basics here, but you'll get the idea of how to use
filters and can go on searching the net to find filters that best fit your needs.
if you think you've found a special gem, please let me know and I'll probably
include it in the guide (contact info at the end of the document).
Cropping at 352*288 in order to create a VCD you can just skip this passage, because the program (e.g., TMPEG) that handles the encoding process will take care of this too. In most movies there are black borders on the top and bottom. To take them through the compressing steps just takes up resources for the movie and therfore we'll just cut them off in advance. You can accomplish this as follows:
Video -> Filters -> Add
In the window choose the "Nulltransform" filter and click ok.
Now just click "Cropping" to open the following window:
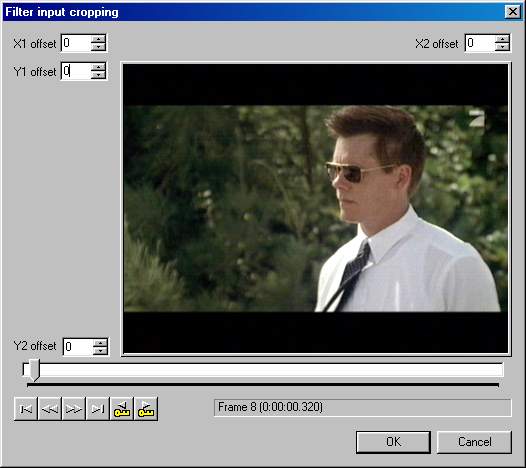
As you probably expected you can crop left (X1 offset), right (X2 offset),
above (Y1 offset) and below (Y2 offset).
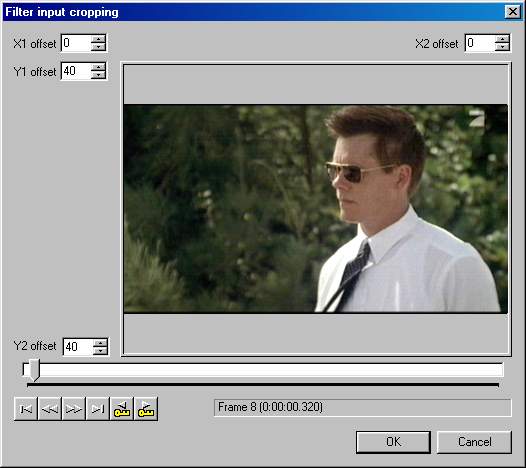
In this case I only want to crop above and below, but sometimes you'll get small
black stripes on the sides which you might want to crop off as well. Now you
should find a scene where you can see as exact as possible where the borders
start, preferably something bright. Then you'll just have to enter the appropriate
pixel counts that have to be cut off in the appropriate fields. This is a trial
and error problem, but shouldn't be too though to solve though! The only thing
you'll have to watch is that your final resolution is a multiple of 2. Otherwise
the encoder will return an error as soon as you want to start encoding in VirtualDub.
A small trick: if your Y1 + Y2 are a multiple of 2 you'll be OK. You're finished
with this step, so hit OK twice.
And at this step the watermark that was created when using the MJPEG demo version now disappears as long as you are capturing 16:9 content, because of the black borders being cut off. Of course people capturing 4:3 content don't have this advantage, and will have to register the codec.
Additional filters
If you have specific problems you might want to use one of these additional filters:
1. "normal" clips with snowlike noise
temporal smoother (by default) on the 2nd tick
2d cleaner optimized (by Jim Casaburi) using the default settings
2. Anime
Only 2d cleaner optimized
If you have noise you can also use temporal smoother, but even better is Warpsharp
(by Avery Lee)
Next step: cutting out commercials: <NEXT>
Back to the Index: <HOME>
Last edited on: 02/12/2003 | First release: n/a | Author: BaronVlad | Translator: SteVe (killingspree) | Content by Doom9.de