FlaskMpeg
Start up FlaskMpeg and select File - Open Media and select the IFO file you've copied. If you'e ripping directly from the DVD this will bring up an additional screen where you can enter the disc key.
>> Read more about
ENCODING DIRECTLY OFF THE DVD
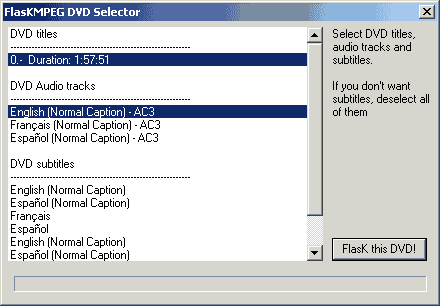 You'll then be presented with the following screen. If there's more than one title with the same lenght select the first one. If there's titles which have a different lenght use your DVD player to find out which lenght corresponds to the version of the movie you want to convert (like regular edition, or director's cut).
Also select the desired audio track and subtitle track. If you don't want subtitles simply select no subtitle stream.

Basically everything on this screen is self explaning. Move the slider a bit to the right then start playing. The 0.6x tree is much better at recognizing the right framerate but old habits die hard so if you have a PAL movie (basically European and Australian releases) and if it detects something other than 25fps we'll have to fix that in the next screen. Note that all NTSC movies are 29.97fps but the detected fps will not necessarily be the same number, so if there's an inconsistency between these 2 values there's nothing to worry about. Make a mental note of the video structure. You can also limit the encoding range using the 4 buttons above Job1. Now we're going to verify if the selected audio track is really the right one. Press the Audio Player button.
 Use the horizontal slider to move to a position where you can hear people talking. If the language is wrong select another track from the available ones. Repeat the procedure until you've found the right one and note the position of that track in the Available tracks dropdown list. Now go back to the main window and load the IFO again, this time selecting the audio track in the DVD Selector window which is at the same position as the track you've selected in the audio player.
Check Dynamic Range Compression to get a louder general volume.
Do NOT select Normalization, DRC is much superior to Normalization. Use th slider
in the DRC box to set the volume level. Then make sure the Dolby Surround downmix
button is pressed to get a true Dolby Surround downmix. Press OK when you're
done.
Then press the Configure button:
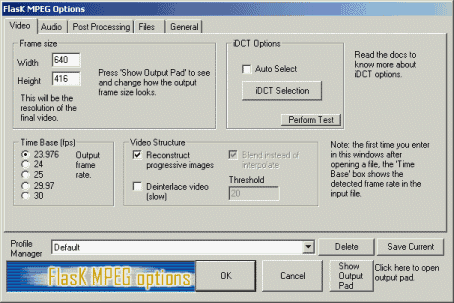 If Flask wrongfully detected the fps you can adjust it here. If the video structure was purely Interlaced you'll have to uncheck Reconstruct progressive Images and check Deinterlace video.
Then press the iDCT Selection button.
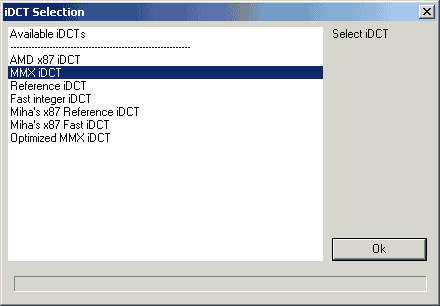 MMX iDCT is the fastest and you should select that for every type of CPU. This is the fastest mode, both Intel and AMD optimized ones are much slower since these are reference quality iDCTs, which means they're optimized for quality, not speed. However, I've shown before that this quality difference is purely theoretical and can't be seen.
If you're not convinced of my examples then select Miha's x87 Fast iDCT, this is the fastest reference quality iDCT there is.
Then next step begins by clicking on the audio tab.
>> BACK
This document was last updated on 07/18/02